How to create your own route

1Go to the “Home” tab (Picture 1)

“Home” (Picture 1)
2Clear the current route (Picture 2)
- If there is a current route open, clear it by clicking the “x” in the upper right corner
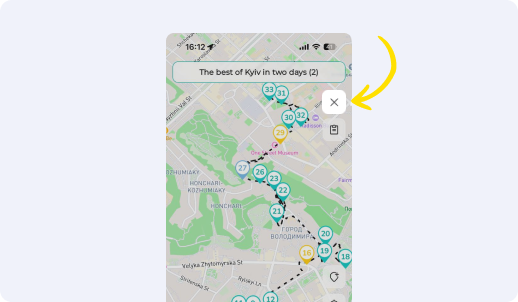
Clear the current route (Picture 2)
3Start searching for places and add the first place to your itinerary
- To do this, find the place by name using the search (the “Magnifying glass” button in the lower right corner), find the place in the list and click “+” on the place card (Picture 3.1)
? Info
If the place does not exist in the application, you need to create it. To do this, click the “Add place” icon in the lower right corner (Picture 3.2), move the map to adjust the location of the place, click Next, and follow the instructions
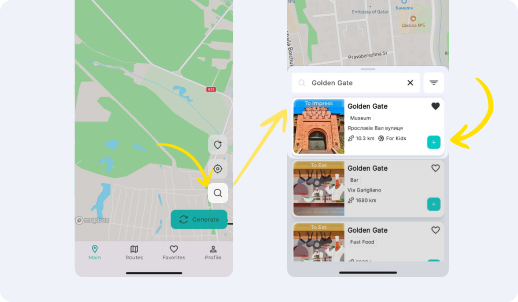
Place search (Picture 3.1)
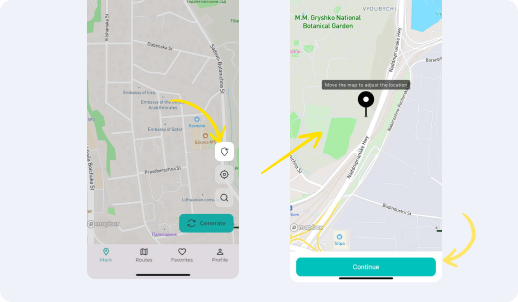
Adding a place to the map (Picture 3.2)
4Add the following places to your itinerary
- Continue adding locations by repeating the steps from the previous step (Picture 3.1)
Place search (Picture 3.1)
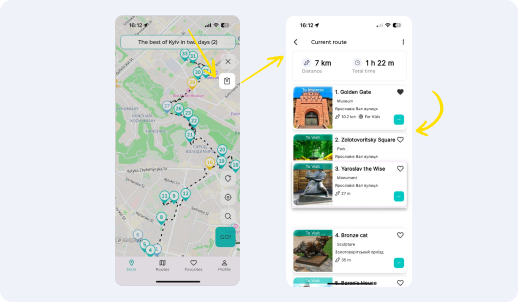
5Adjust the order of places
- Sometimes places are added automatically in a not optimal order. Therefore, you can change the order of places manually. To do this, open the route sidebar (icon in the upper right corner under the cross), click on the desired place, and drag it to a new position. Continue until you reach the desired order of places.
6Save your route
- To save a route, open the route sidebar, click Save route, select Your private route, and follow the further prompts (Picture 6.1)
? Info
- A private route will be available only to you and other users will not be able to see it.
- You can also make this route “Public” so others can use it (look at the next step)
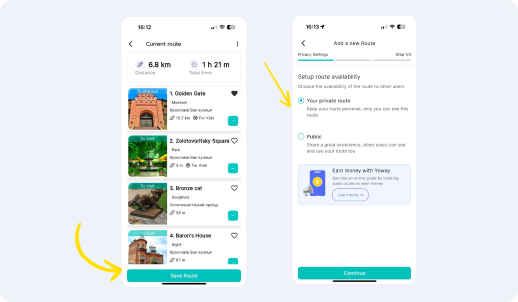
Save route (Picture 6.1)
7Make your route available to other users
- To save a route, open the route sidebar, click Save route, select Public route, and follow the further prompts (Picture 7.1)
? Info
- A public route must have photos for all locations. Therefore, before saving, review the locations using the sidebar, and add images for locations without photos (Picture 7.2).
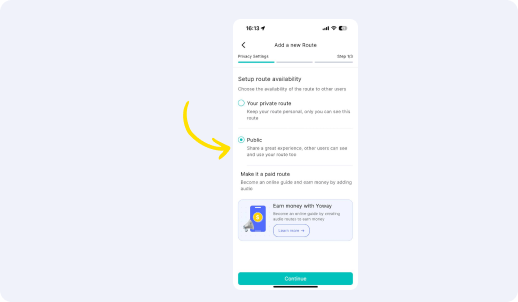
Save public route (Picture 7.1)
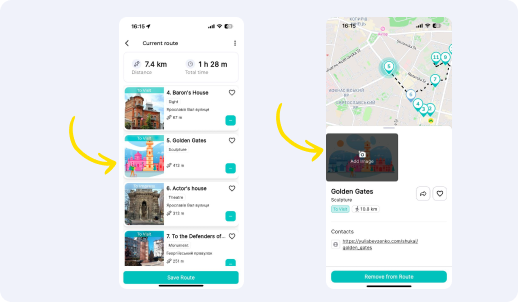
Save public route (Picture 7.2)
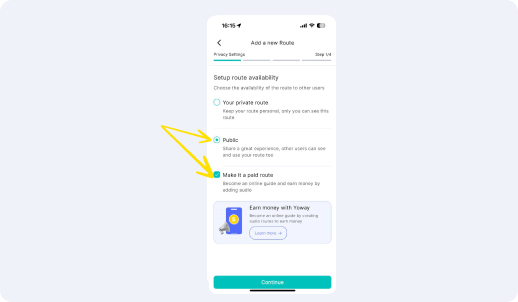
8Save your paid route
- First, you need to make the route Public and select the additional option “Make it a paid route” (Picture 8.1)
? Info
- A paid route, in addition to photos, must have audio recordings. Therefore, before saving, you need to dictate stories and interesting facts about each place, and save them in mp3 format.
- You also need to record an audio presentation of the route that users can listen to before purchasing it.
- In the last step of saving the route, you need to upload the audio files and click the “Publish” button (Picture 8.2).
Save public route (Picture 8.1)
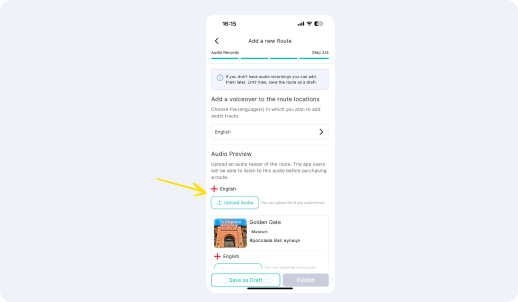
Add audio files (Picture 8.2)
Download the app to open this and other exciting routes